Quick Answer
Tuckpointing (repointing brick mortar) in Melbourne costs $35–$80 per square metre for standard brick walls, or $50–$120 per square metre for heritage lime mortar work. A typical single-storey Melbourne home costs $800–$3,500 to fully repoint, depending on wall area and mortar condition. Autumn is the best time to repoint — mortar cures better in cool, low-UV conditions before the winter rains arrive.
Crumbling, hollow or cracked mortar joints are one of the most common maintenance issues in Melbourne’s older brick homes — particularly properties built before 1990 in inner suburbs and south-east areas. Left untreated, failed mortar lets water into the wall cavity, causes rising damp, deteriorates brickwork, and accelerates structural problems. Repointing is a cost-effective way to protect your home before winter, and this guide covers what it costs, when it’s needed, and whether any of it can be DIY’d.
What Is Tuckpointing and Repointing?
The terms are often used interchangeably in Australia but technically differ. Repointing means cutting out deteriorated mortar and replacing it with new mortar — this is the practical maintenance job most Melbourne homes need. Tuckpointing (in the traditional sense) is a decorative technique using two contrasting mortars to create the illusion of fine, precise joints. In everyday Australian usage, “tuckpointing” now commonly refers to the full repointing process, which is how tradespersons and most homeowners use the word.
Tuckpointing Cost by Wall Type
| Wall Type | Cost per m² | Notes |
|---|---|---|
| Standard brick veneer (single skin) | $35–$60/m² | Most common in Melbourne homes built after 1970 |
| Double brick (solid brick construction) | $45–$80/m² | More joints per area; common in pre-1970 homes |
| Heritage / lime mortar repointing | $70–$120/m² | Requires matching lime mortar; specialist trade |
| Feature stone or bluestone | $80–$150/m² | Irregular joints; slower work; specialist required |
| Chimney repointing (per chimney) | $400–$1,500 | Height access surcharge; flashing inspection included |
Typical Full-House Repointing Costs for Melbourne Homes
| Home Type | Approx. Wall Area | Estimated Cost | Notes |
|---|---|---|---|
| Small single-storey (2 bed) | 50–80m² | $1,750–$4,800 | Depends on how much mortar needs replacing |
| Standard single-storey (3–4 bed) | 100–140m² | $3,500–$8,400 | Partial repointing often all that’s needed |
| Double-storey | 160–220m² | $7,200–$17,600 | Scaffolding required; adds $800–$2,500 |
| Partial repointing (front wall only) | 20–40m² | $700–$2,400 | Most common scope; prioritise exposed walls |
What Affects Tuckpointing Costs?
Depth and Extent of Mortar Deterioration
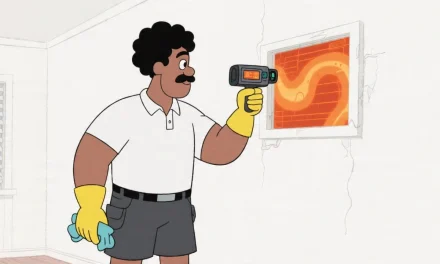
If only 20–30% of mortar joints need repointing, tradespeople will charge for the actual area worked rather than the full wall area. A thorough inspection with a metal probe (tap each joint — a hollow sound means failed mortar) lets you get an accurate scope quote rather than a full-wall price when only targeted work is needed.
Access and Height
Ground-floor walls can be worked from ladders. Any work above 2 metres typically requires scaffolding or an elevated work platform (EWP) — add $800–$2,500 for scaffolding erection/dismantling on a standard Melbourne home. Internal walls (courtyard-facing walls or internal-facing walls in double-brick homes) can also add complexity and cost.
Mortar Matching
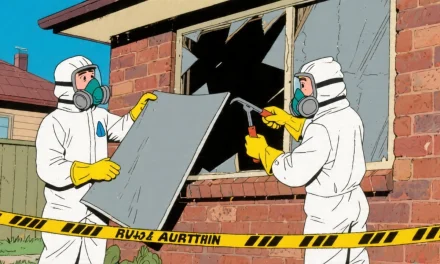
The new mortar must match the original in colour, texture and strength. On pre-1960 homes, the original mortar is likely lime-based (not cement-based), and using modern cement mortar to repoint a lime-mortar wall causes moisture problems and accelerated brick spalling. Heritage properties and older double-brick homes need a lime mortar specialist — they charge 40–80% more but the work lasts 30+ years without damaging the bricks.
Signs You Need Repointing
| Sign | What It Means | Urgency |
|---|---|---|
| Mortar recessed more than 5mm from brick face | Surface erosion; water channelling into joint | High — do before winter |
| Crumbling mortar that powders when touched | Mortar has failed completely in that section | High — immediate repair needed |
| Hollow sound when joint is tapped | Mortar has separated from brick behind | High — water already infiltrating |
| Hairline cracks in mortar joints | Thermal movement or minor settling | Medium — monitor; repoint within 12 months |
| White efflorescence (salt staining) | Moisture already moving through wall | High — source moisture first, then repoint |
| Diagonal stair-step cracks across joints | Could indicate structural movement | Get builder to assess first |
Can I DIY Tuckpointing?
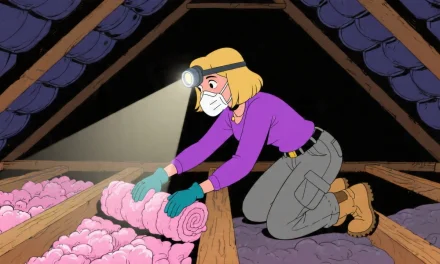
Small-scale repointing on accessible ground-floor walls is DIY-able if you’re patient and thorough. The key steps are: cut out old mortar with an angle grinder fitted with a mortar raking blade or a bolster chisel to at least 15mm depth; vacuum out all dust; dampen the joints before applying new mortar; press mortar in firmly in layers; tool the joint to match the existing profile while still wet.
Where DIY fails is mortar matching. Using the wrong mortar mix (too hard, wrong colour) on heritage brickwork causes the bricks themselves to spall and crack over time, turning a $500 repair into a $5,000–$10,000 brick replacement job. If the bricks are old or heritage, always use a specialist.
Top 10 Tips and Gotchas
- Autumn is the best time to repoint. Mortar needs consistent mild temperatures (10–25°C) to cure properly. Melbourne’s autumn gives ideal conditions — avoid repointing in summer heat or during a wet spell when freshly placed mortar gets washed out before it sets.
- Cut back at least 15mm before repointing. Pointing a thin skin of mortar over the top of old deteriorated mortar is a waste of money — it fails within 12–18 months. Old mortar must be cut back at least 15mm deep before new mortar is packed in.
- Don’t use cement mortar on old lime-mortar walls. This is the most expensive mistake in heritage repointing. Cement mortar is harder than the bricks in pre-1960 homes — moisture that would normally pass through the joints instead pushes through the bricks, causing spalling that can’t be undone cheaply.
- Match the joint profile. The profile of the finished joint (recessed, flush, weathered, trowelled) affects both appearance and water shedding. Look at the existing joints on sound sections of wall and match the profile in your repair.
- Investigate stair-step cracks before repointing. Diagonal stair-step cracks in mortar joints can indicate foundation movement, particularly in Melbourne’s reactive clay-soil south-eastern suburbs. Repointing over these without addressing the cause is money wasted — the cracks will re-appear next dry season.
- Scaffolding costs are a significant addition. Don’t compare per-m² quotes without checking whether scaffolding is included. A quote of $50/m² with scaffolding included is better value than $40/m² without it if scaffolding hire is $1,500 extra.
- Check chimney flashing at the same time. If the chimney is being repointed, have the tradesperson inspect and replace the lead or aluminium flashing around the chimney base at the same time — it’s the most common cause of internal water damage in Melbourne brick homes and is much cheaper to do while the scaffolding is already up.
- Get a written scope of works. Quotes for repointing vary significantly based on how much mortar the tradesperson commits to replacing. A written scope (e.g. “all north, east and west wall joints to 15mm depth, excluding south wall”) prevents disputes after the job.
- Damp the bricks before applying mortar. Dry bricks pull moisture out of fresh mortar too fast, weakening the bond and causing the repair to crack. Lightly mist the joint area with water before packing in new mortar.
- Check the work after the first rain. A properly repointed wall won’t show water staining or efflorescence after rain. If white salt stains appear at newly repointed sections after the first wet weather, the mortar mix is wrong or wasn’t pushed in deeply enough — call the tradesperson back to inspect.
Local Melbourne Resources
- Bunnings — Brick Mortar and Pointing Products
- Heritage Victoria — Heritage Property Guidance and Licensed Specialists
- Victorian Building Authority — Licensed Builders for Structural Assessment
- Bricks & Pavers Industries — Mortar Matching Resources
Frequently Asked Questions
How long does tuckpointing last in Melbourne?
Modern cement-based repointing on a standard brick veneer home typically lasts 15–25 years before needing attention again. Lime mortar repointing on heritage double-brick homes, done correctly by a specialist, can last 30–50 years. The main factors that shorten lifespan are using the wrong mortar mix, insufficient cutting-back depth, and leaving the underlying moisture source untreated before repointing.
Can tuckpointing fix water leaks through brick walls?
Yes, failed mortar joints are one of the most common causes of water penetrating brick walls. Repointing the deteriorated joints will stop water entry through those specific pathways. However, if water is also entering through cracked bricks, failed window or door sealant, or inadequate roof/wall flashing, repointing alone won’t solve the problem — the full moisture pathway needs to be identified and addressed.
How do I know if my mortar needs replacing?
Run your finger firmly along a mortar joint. If mortar crumbles or comes away easily, it needs replacing. Press a metal probe into the joint — if it sinks in more than 5–10mm or the mortar sounds hollow when tapped, it has failed. White salt staining (efflorescence) on the brick face is another indicator that moisture is already moving through deteriorated joints.
Do I need a permit for tuckpointing in Melbourne?
Standard maintenance repointing (replacing like-for-like mortar in existing joints) does not require a building permit in Victoria. However, if the property is heritage-listed or in a heritage overlay, some councils require you to notify them before carrying out even minor masonry repairs. Check with your local council’s heritage officer if you’re unsure.
What is the difference between repointing and rendering?
Repointing replaces the mortar in the joints between individual bricks while leaving the brick faces exposed. Rendering covers the entire wall surface in a layer of cement or lime render, hiding both the bricks and joints. Rendering is more expensive (typically $40–$100/m²) and changes the aesthetic of the home completely. Repointing is the right choice when the bricks themselves are in good condition and you want to maintain the brick look.
Final Thoughts
Repointing is one of the best investments for Melbourne homes with brick construction — it protects the structure from water damage for a fraction of the cost of fixing the resulting problems if you leave it too long. Autumn is the ideal time to act, the mortar cures well, and you’re sealed up before the winter rain. Get three quotes specifying exactly which sections need work and whether scaffolding is included.
- Don’t use cement mortar on pre-1960 homes — use lime mortar specialists only
- Cut back at least 15mm deep or the repair will fail
- Investigate diagonal cracks before repointing — they may signal structural movement
- Check chimney flashing while scaffolding is already up